Updates: I've fixed a few problems people have reported, particularly problems building on Unix and using Visual C++. This chapter also got featured on Reddit.
In the previous chapter I gave a big-picture overview of the graphics pipeline. Now it's time to put it into action. Before we try rendering any fancy 3d scenes, I'll follow standard tutorial protocol and use a simple, two-dimensional "hello world" app to demonstrate the basics of the OpenGL API. We're going to take this image:

and draw it to an appropriately-sized window. But static images are kind of dull—how about we make it a little more interesting by fading back and forth with this image:

Still not all that exciting a program, but despite its simplicity, the program will exercise almost all the parts of OpenGL a more complex program would. The completed source code is up on Github here. At 380 lines of C and a couple dozen lines of shader code, this program may seem like overkill just to draw an image to the screen. However, much of it will lay the groundwork for the more interesting demos to come. The hello-gl.c source file contains the OpenGL rendering bits, while util.c contains boring utility functions for reading TGA image files. I've included the two images, hello1.tga and hello2.tga, in this format, because it's easy to parse without depending on an external library. Our shader code lives in two files: hello-gl.v.glsl for the vertex shader, and hello-gl.f.glsl for the fragment shader.
In this chapter, I'll explain how the different parts of the hello-gl program use the OpenGL API to feed data into the graphics pipeline and put it in action. I'll also give a brief overview of the GLSL language when we look at shaders. It's a lot to cover all in one blog post, so I'll break the chapter up into four parts. In this first part, we'll get a window open with GLUT. In the second part, we'll set up the buffer and texture objects that will contain the raw vertex and image data for our program. After that, we'll write the shader code that will process that data into our final image on screen, and then feed the shader into OpenGL. In the final article, we'll go through the OpenGL calls that actually render to the screen. Now that our game plan's laid out, let's start putting the players on the field. We'll start things off by setting up GLUT and getting an empty window up on the screen.
OpenGL header files
#include <stdlib.h>
#include <GL/glew.h>
#ifdef __APPLE__
#  include <GLUT/glut.h>
#else
#  include <GL/glut.h>
#endif
Different platforms keep their OpenGL headers in different places, but with GLEW, you don't need to worry about that. Including GL/glew.h will pull in the system OpenGL headers for you, wherever they may live. Unfortunately, including GLUT still requires you to manually step around some cross-platform landmines. Its header traditionally lives in GL/glut.h, but MacOS X's bundled GLUT framework uses Apple's own header file convention, putting the GLUT header in GLUT/glut.h. There's also a bug in the way recent versions of Visual Studio's standard C headers interact with glut.h that requires stdlib.h to be included before it.
Setting up our window with GLUT
int main(int argc, char** argv)
{
    glutInit(&argc, argv);
    glutInitDisplayMode(GLUT_RGB | GLUT_DOUBLE);
    glutInitWindowSize(400, 300);
    glutCreateWindow("Hello World");
    glutDisplayFunc(&render);
    glutIdleFunc(&update_fade_factor);
GLUT provides a limited, but straightforward and portable, interface to the window system. After prepping GLUT by calling glutInit, we use glutInitDisplayMode to specify what buffers our default framebuffer should have. In our case, a color buffer (GLUT_RGB) with double buffering (GLUT_DOUBLE) is sufficient. (Double buffering provides two color buffers to the framebuffer, alternating which buffer is displayed onscreen and which buffer is drawn into every frame so that animation appears smooth.) If we needed a depth or stencil buffer, we could also ask for them here. We then set the initial size for our window to the 400×300 size of our images with glutInitWindowSize and create the window with glutCreateWindow. Finally, we designate two callbacks to receive window events: a glutDisplayFunc to render our image when the window needs displaying, and a glutIdleFunc to continuously update the fade factor between the two images over time.
    glewInit();
    if (!GLEW_VERSION_2_0) {
        fprintf(stderr, "OpenGL 2.0 not available\n");
        return 1;
    }
After GLUT creates our window, it prepares OpenGL so that we can start making calls into the library. The first thing we do is initialize GLEW. When glewInit is called, it sets a bunch of flags based on what extensions and OpenGL versions are available. We check the GLEW_VERSION_2_0 flag here to ensure we have OpenGL 2.0 available before proceeding. Besides the version flags it sets, GLEW's role is mostly invisible, and we won't need to interact with it after it's been initialized.
    if (!make_resources()) {
        fprintf(stderr, "Failed to load resources\n");
        return 1;
    }

    glutMainLoop();
    return 0;
}
With GLEW initialized, we call our make_resources function to set up our OpenGL resources. We'll build up that function over the next few parts of this chapter. If our resources load successfully, glutMainLoop takes over. It displays the window, starts receiving UI events from the window system, and invokes the callbacks we set up in response to those events. It will also exit the program for us when the user quits. The return 0 merely suppresses compiler warnings and never actually gets reached.
Compiling and running our program
At this point, we can stub out our GLUT callbacks and make_resources function and get a working, if pointless, program:
static int make_resources(void)
{
    return 1;
}
static void update_fade_factor(void)
{
}
static void render(void)
{
    glClearColor(1.0f, 1.0f, 1.0f, 1.0f);
    glClear(GL_COLOR_BUFFER_BIT);
    glutSwapBuffers();
}
glClearColor sets an RGBA clear color (in this case, white), which glClear then uses to fill the framebuffer's color buffer. glutSwapBuffers then brings our cleared color buffer to the screen. With these stubs in place, we can now compile and run our program. This stubbed-out version is in the Github repo as hello-gl-dummy.c. The command to compile the program and link it to the OpenGL, GLUT, and GLEW libraries will vary across platforms. On most Unixes it should look something like this:
gcc -o hello-gl-dummy hello-gl-dummy.c \
    -I/usr/X11R6/include -L/usr/X11R6/lib \
    -lGL -lGLEW -lglut
On MacOS X:
# Assuming GLEW was installed to /opt/local
gcc -o hello-gl-dummy hello-gl-dummy.c \
    -I/opt/local/include -L/opt/local/lib \
    -framework OpenGL -framework GLUT -lGLEW
On Windows with Visual C++:
cl /Fohello-gl-dummy.obj /c hello-gl-dummy.c
link /out:hello-gl-dummy.exe hello-gl-dummy.obj \
    opengl32.lib glut32.lib glew32.lib
On Windows with mingw:
gcc -o hello-gl-dummy.exe hello-gl-dummy.c \
    -lopengl32 -lglut32 -lglew32
The repo also includes makefiles for each of these platform groups. You can build this version of the program using the hello-gl-dummy (or hello-gl-dummy.exe on Windows):
make -f Makefile.MacOSX hello-gl-dummy # or Makefile.Unix or Makefile.Mingw
nmake /f Nmakefile.Windows hello-gl-dummy.exe
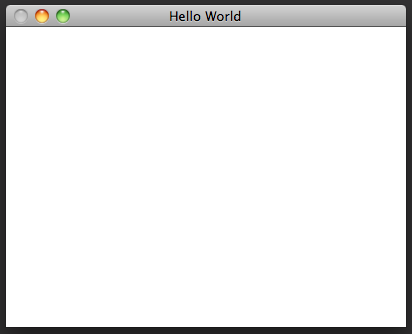
Once you've built the program, you should then be able to run the program and get a white window, as promised:

Close the window, or on MacOS X quit the application, to dismiss it.
Next time, buffers and textures
With the red tape of getting a window open out of the way, we're ready to actually feed our vertexes and images into OpenGL. In the next article, I'll introduce OpenGL's buffer and texture objects.